Under Card Details → Foil, choose the reflections and fine patterns that appear as light hits the card. You can change the shape of broad reflections separately from the surface texture revealed by that light.
Open SSR Card Maker · Getting started
Select a comparison image to enlarge it. On mobile, swipe horizontally within a table if it is wider than the screen.
In each table, Before means the card before the setting being compared was changed. The card already contains the uploaded artwork, frame, and text. The examples use the same character and background, custom frame, Karahe title, and bottom caption. Card stock, white underprint, special ink, coatings, and emboss/deboss were disabled. The frame’s and text’s separate hologram materials were also disabled until the per-target examples.
All saved images use the same Recommended angle and Daylight environment. A still image captures one angle, so it cannot show how reflections change as the card moves.
Understand the different controls
- Foil presets: combinations of reflection pattern, color, texture, and strength.
- Reflection mode: the type of light response, such as broad bands, fine lines, or crossing reflections.
- Reflection pattern: the underlying shape through which reflections flow. This is separate from the fine pattern chosen under Surface Texture.
- Reflection color and spectrum: the combination of reflected colors selected under
Reflection color. The base colors of the artwork and text remain intact. - Surface texture: small lines or lattice patterns that appear when lit.
Start with a preset, then change the reflection mode and surface texture one at a time to see what each does. To change metallic materials or films, see the Surface Finish guide. That menu also contains Hologram Materials.
Foil presets
If you are unsure where to start, compare the curving lines of Classic, the V-shaped grain of Diffraction, and the radial grain of Prismatic. Once you find a pattern you like, use Reflection to change how the light behaves.
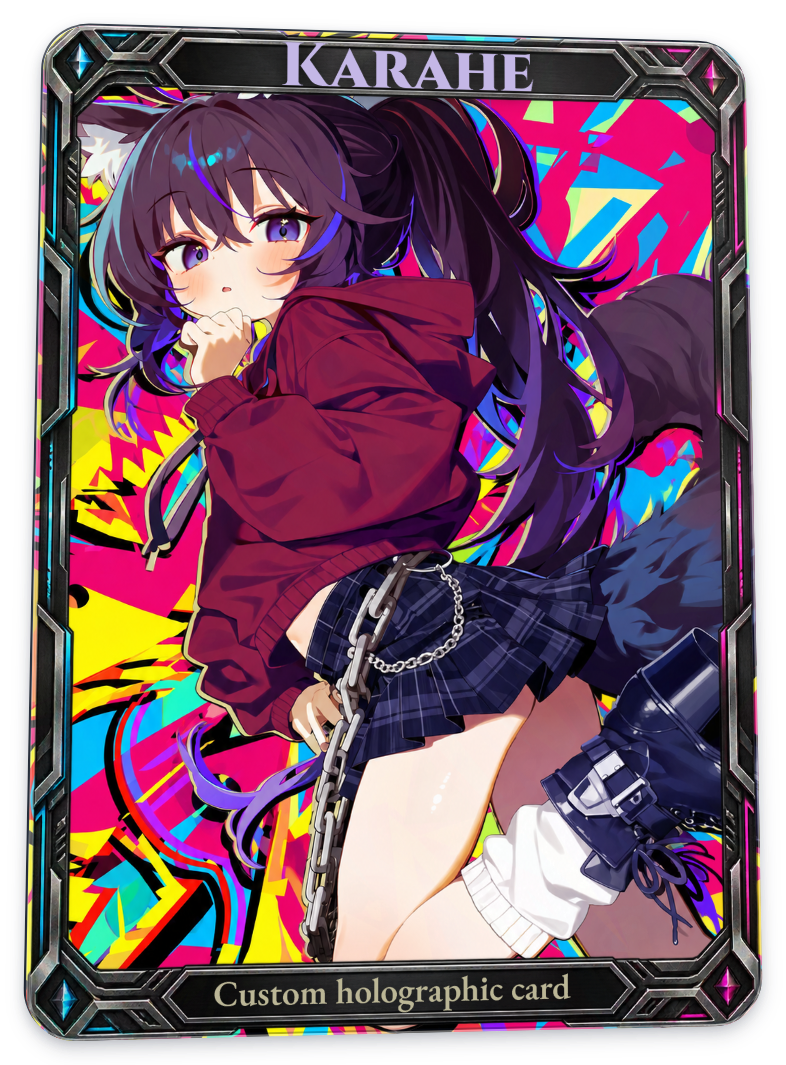
The left side of each table below has Reflection pattern strength and Direct glare strength at 0%, with no surface texture. The right side shows the preset applied. Presets change several settings together.
Foil presets currently do not change the reflection mode automatically. All examples below keep it set to Standard. The ‘Best with’ label beside some names suggests a compatible reflection mode, which you can select separately under Reflection.
Classic
| Before | After |
|---|---|
 |
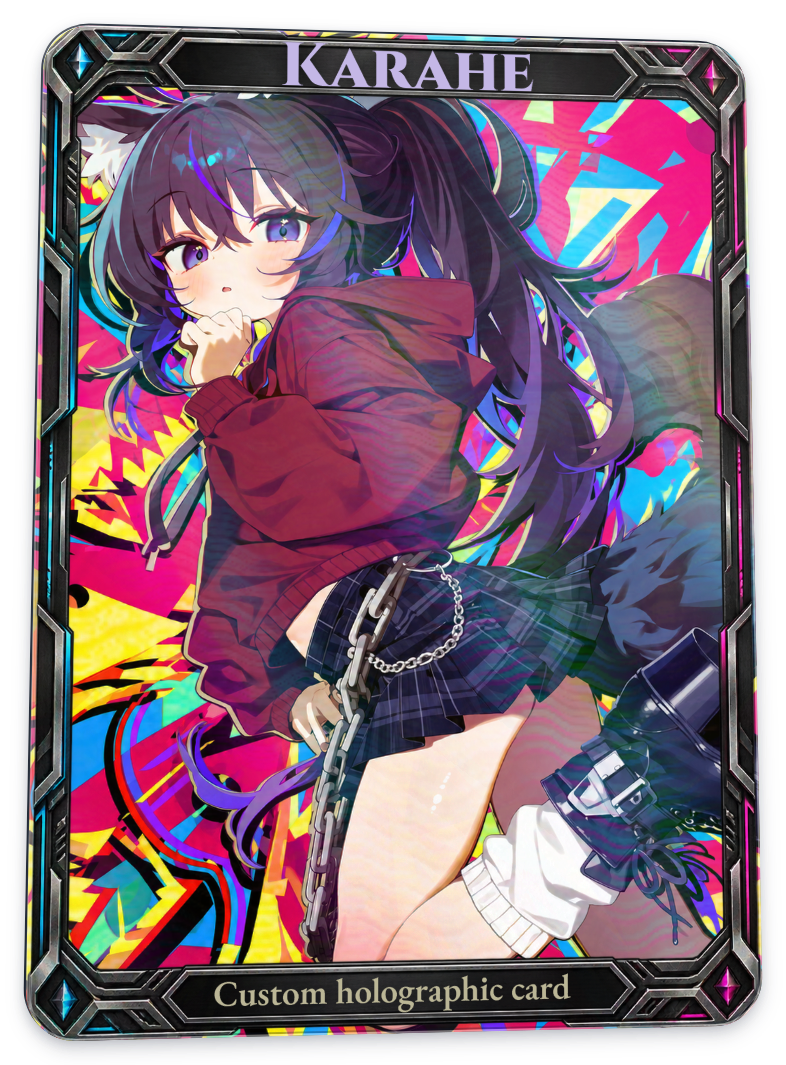 |
A basic combination of gentle reflections and a contour-line-like Contour texture. Look for fine, winding lines in the dark clothing and hair.
Diffraction
| Before | After |
|---|---|
|
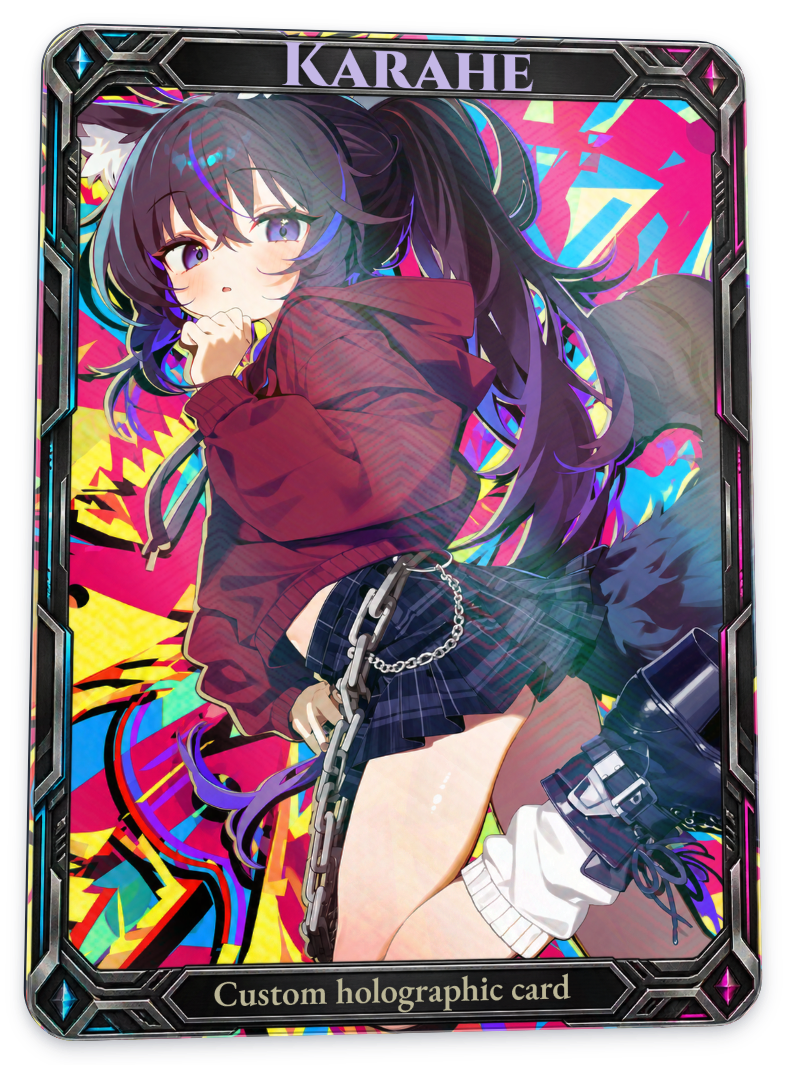 |
Combines a diagonal reflection pattern with a V-shaped Chevron texture.
Prismatic
| Before | After |
|---|---|
|
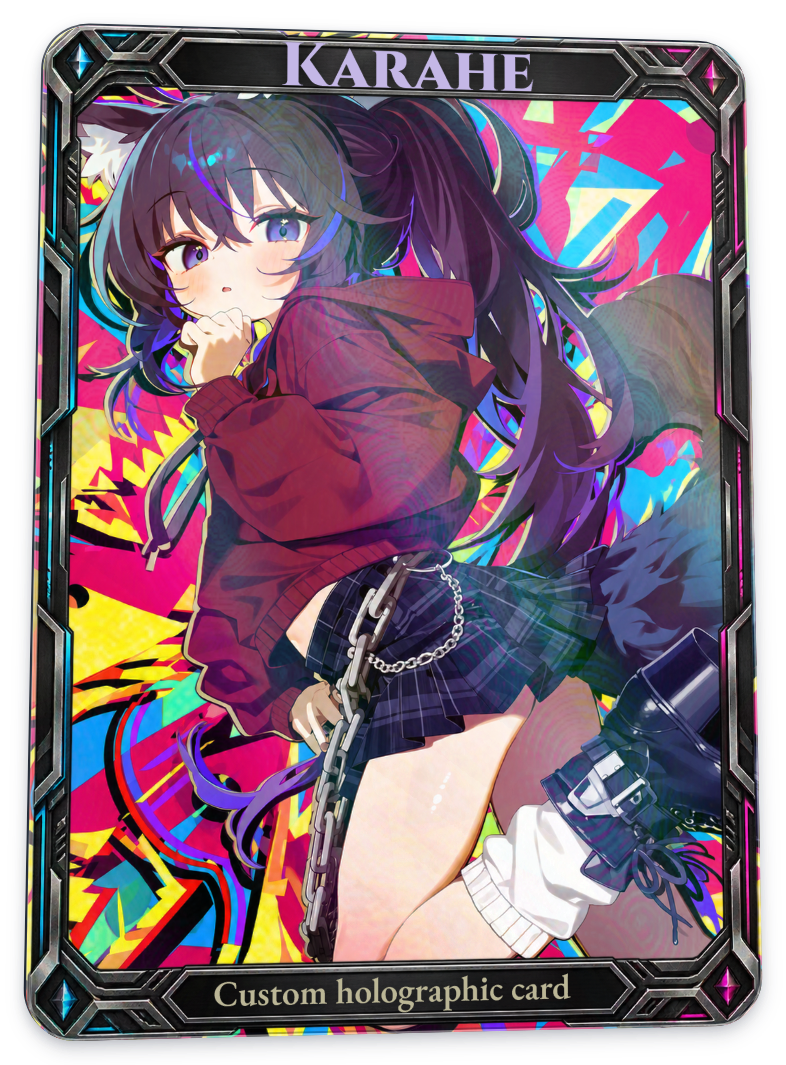 |
Uses radial reflections and texture together. Compared with Classic’s curving lines, these lines appear to converge or spread in a common direction.
Reverse Lattice
| Before | After |
|---|---|
|
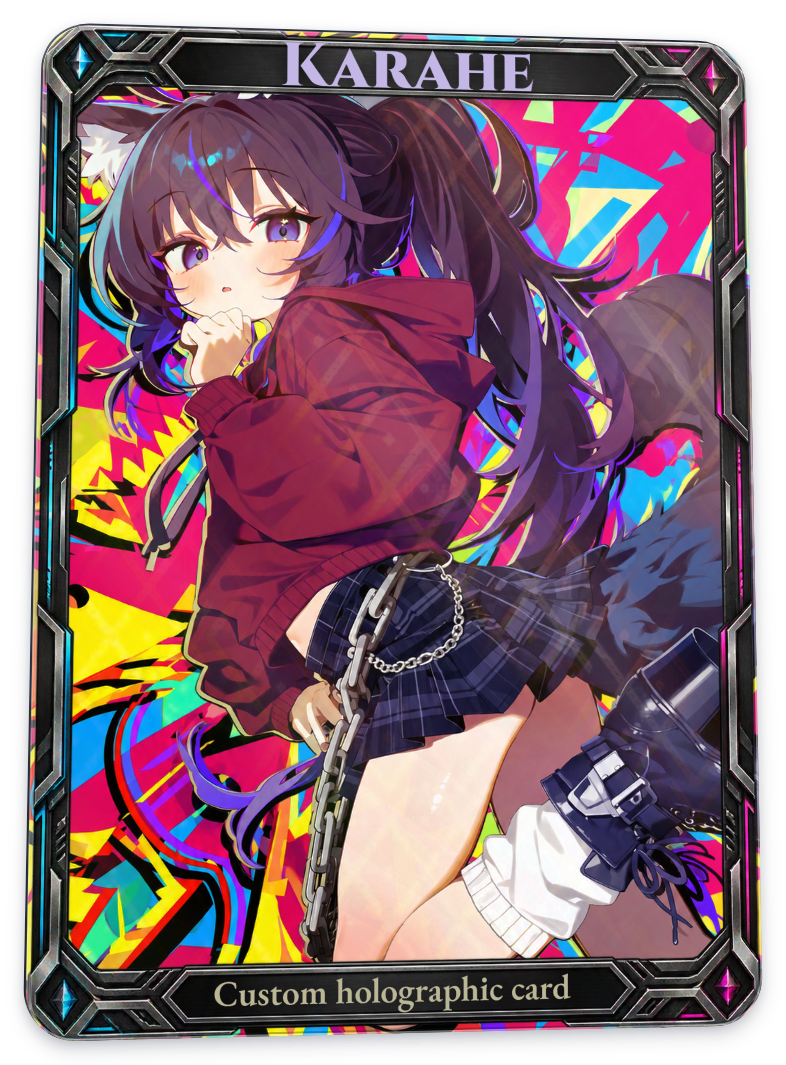 |
Combines a dense lattice with gold-toned reflections. Its suggested reflection mode is Reverse Field. The image above shows the preset alone, without adding that suggested mode.
Holo Scan
| Before | After |
|---|---|
|
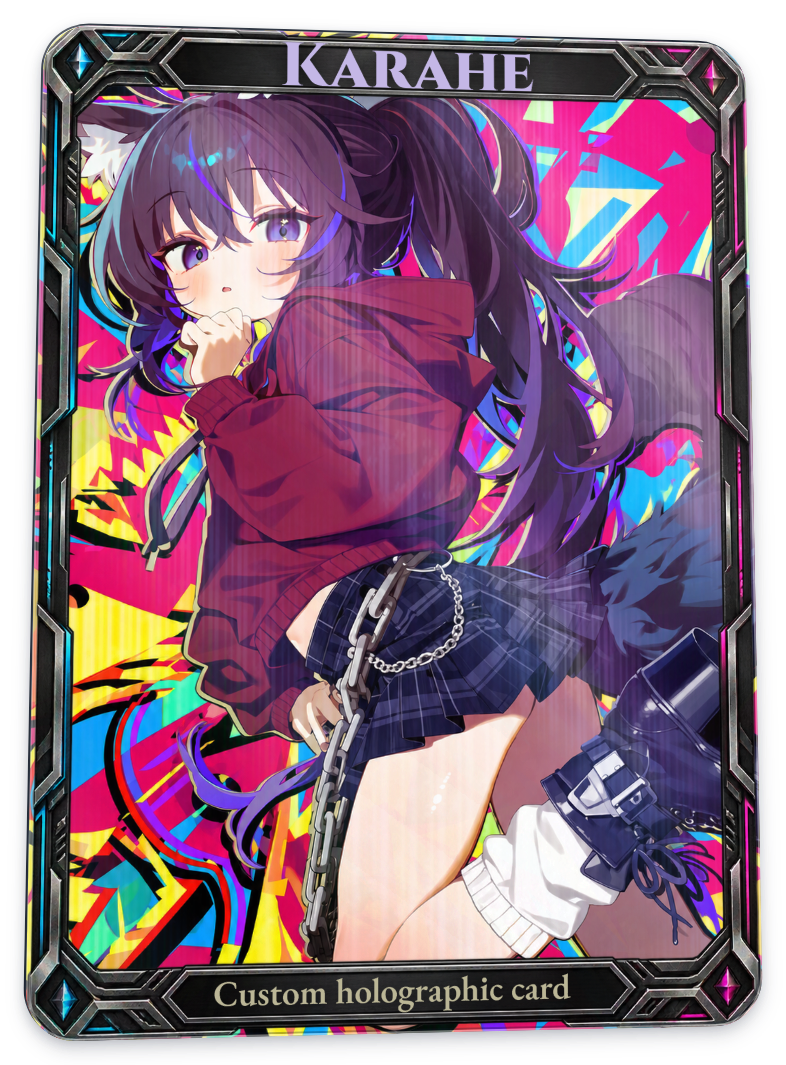 |
Uses dense lines and soft aurora-like colors. Select the suggested Holofoil reflection mode separately to add a fine-line light response.
Prism Dust
| Before | After |
|---|---|
|
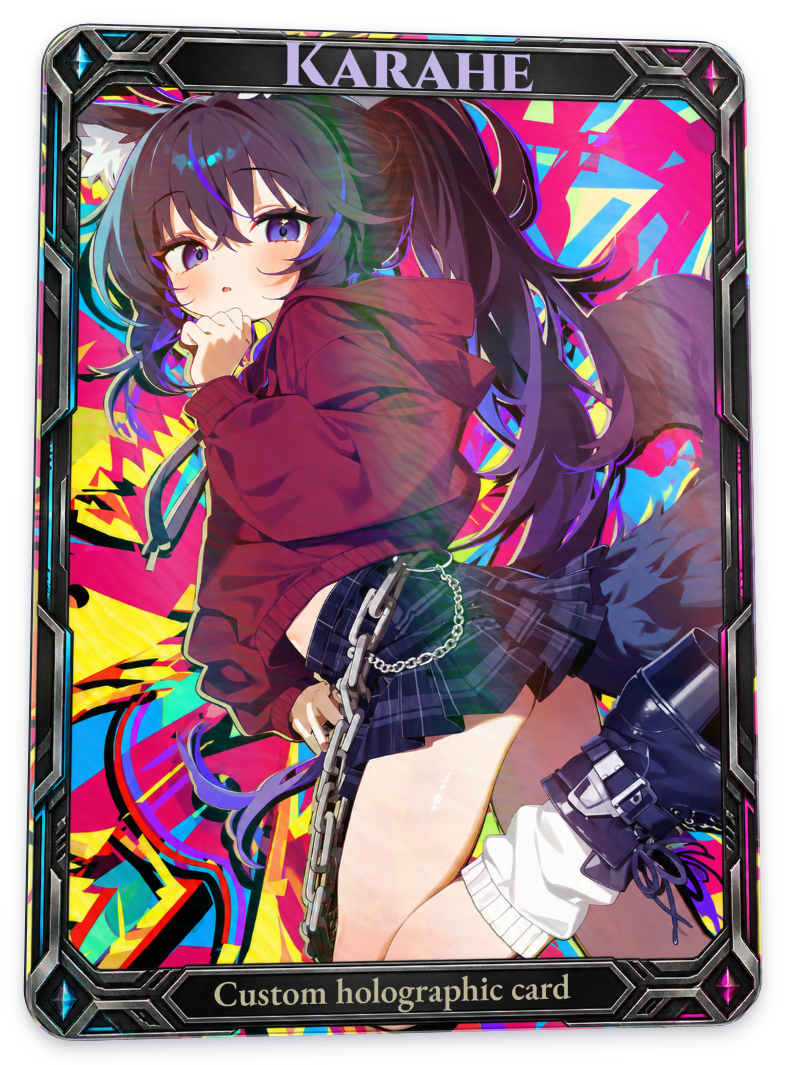 |
Uses a slightly larger Contour texture with purple and teal reflections. Select the suggested Amazing Prism mode to add a particle-like response.
Radiant Focus
| Before | After |
|---|---|
|
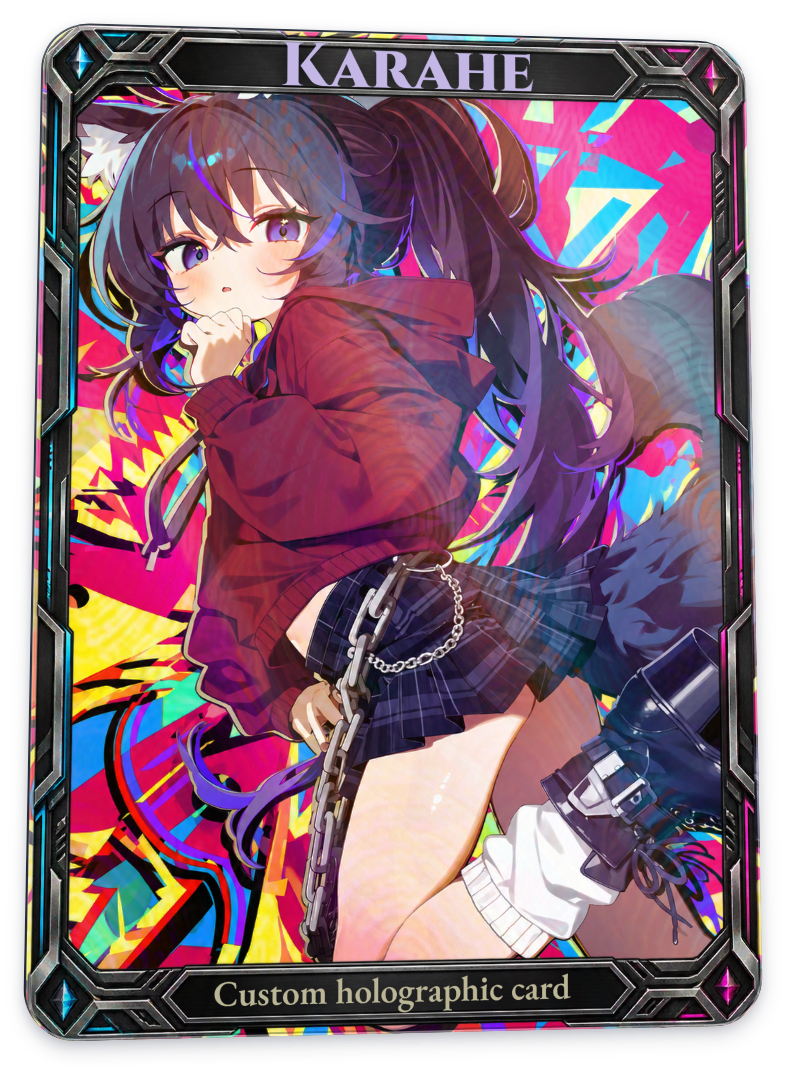 |
Uses a lower-density radial texture to make the flow of lines broader. Its suggested reflection mode is Radiant Spectrum.
V Cross
| Before | After |
|---|---|
|
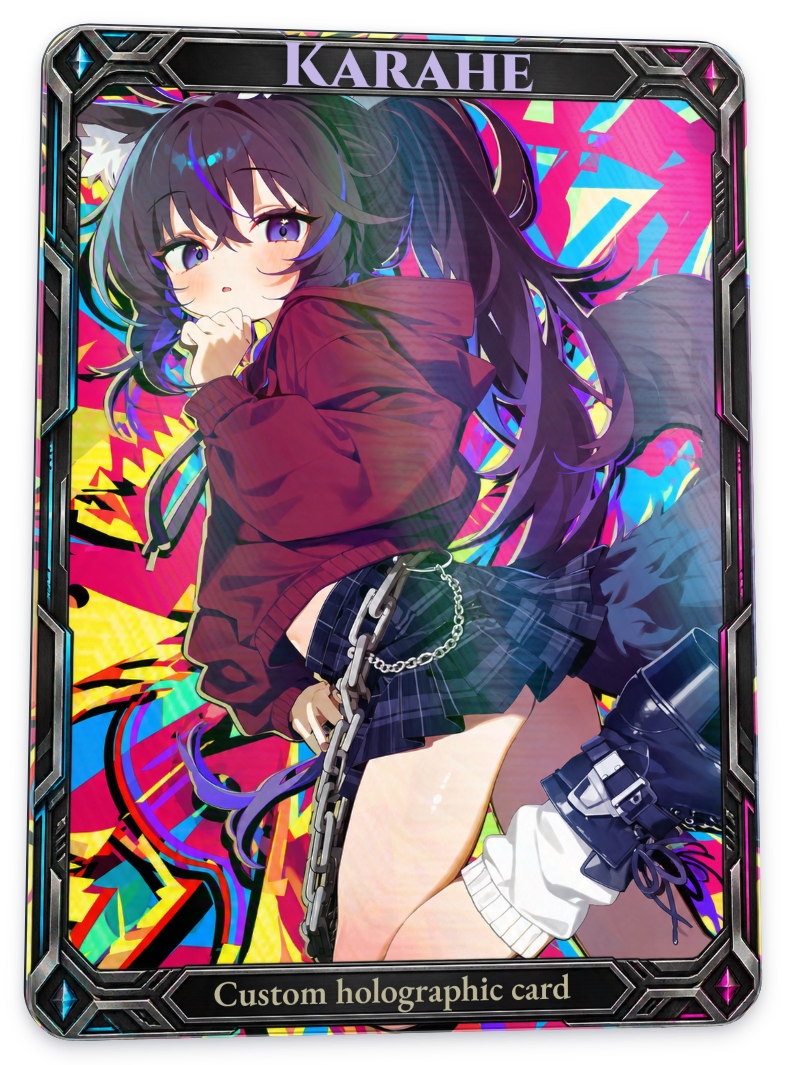 |
Combines a tilted Chevron pattern with green, blue, and magenta tones. Select its suggested V Spectrum mode separately to see crossing light responses.
Reflection mode
Choose this under Reflection. Textures are disabled here to compare the broad light response. After the first table, the left-hand image is a card with Standard reflection already applied.
Standard
| Before · no foil effect | After · Standard |
|---|---|
|
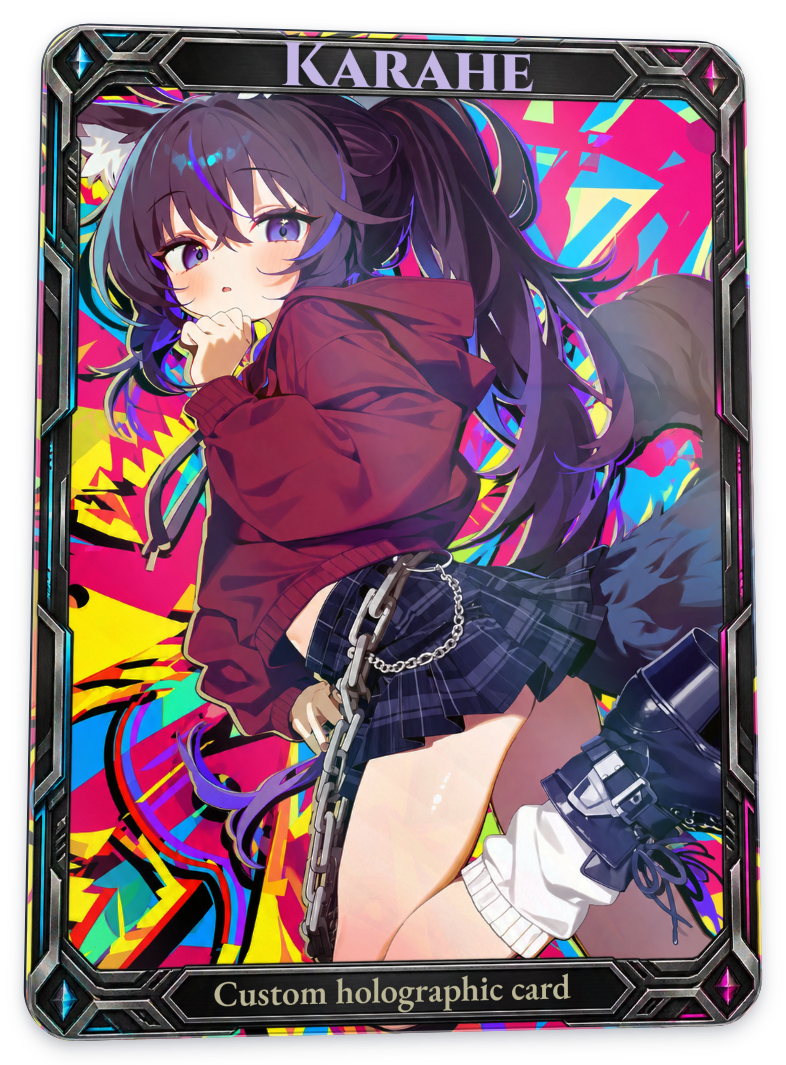 |
Creates a broad reflection band across the card and brightness around the light source. Even without a fine texture, you can see the illuminated area on evenly colored clothing and dark hair.
Reverse Field
| Before · Standard | After · Reverse Field |
|---|---|
|
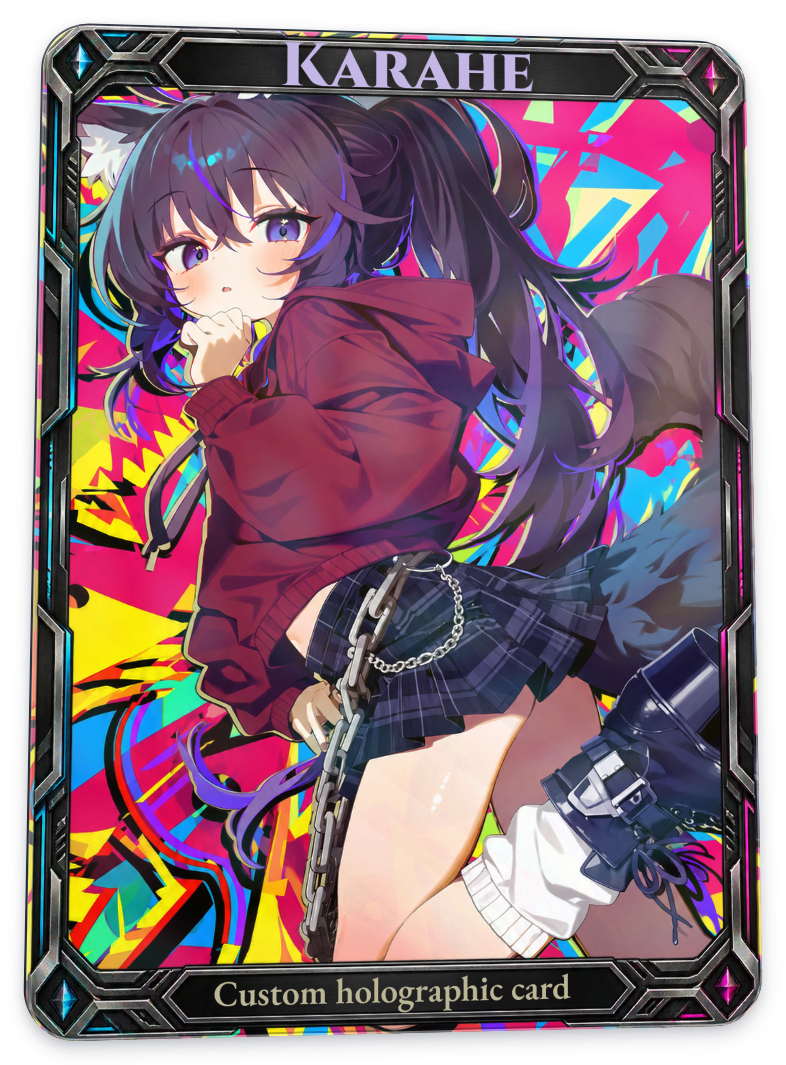 |
Changes the strength of broad reflections and the distribution of bands. Under these conditions, the difference from Standard is relatively subtle.
Holofoil
| Before · Standard | After · Holofoil |
|---|---|
|
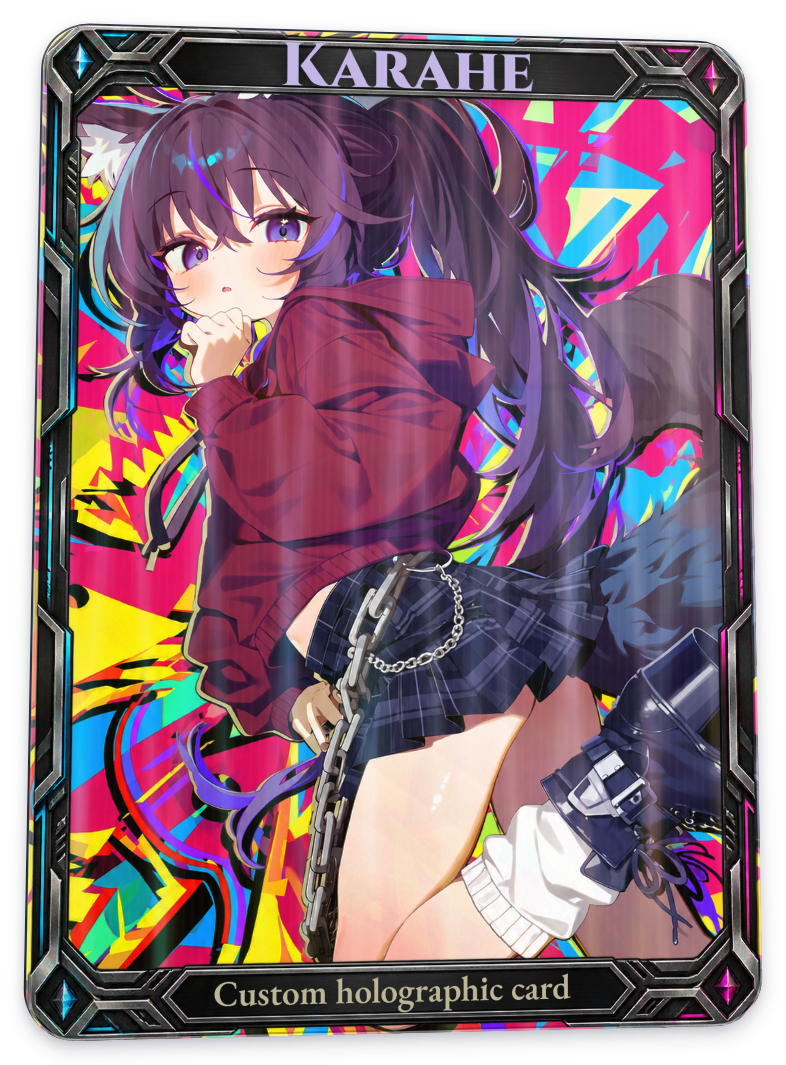 |
Adds fine lines of light alongside broad reflections. Repeated vertical grain is particularly visible over the clothing and hair in this example. These lines come from the reflection mode itself, even without a surface texture.
Amazing Prism
| Before · Standard | After · Amazing Prism |
|---|---|
|
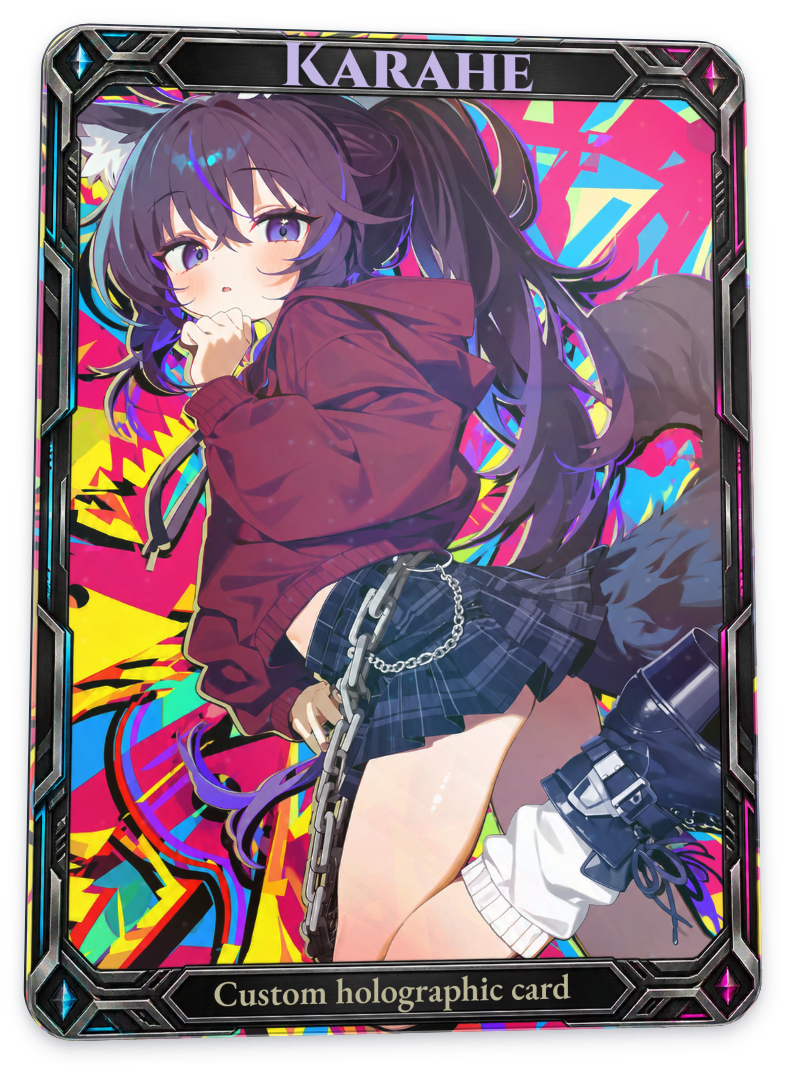 |
Mixes reflections from several directions with small particle-like responses. Use it for localized sparkle rather than a smoothly flowing band. The particles are small, so the difference can be faint on a reduced-size card.
Radiant Spectrum
| Before · Standard | After · Radiant Spectrum |
|---|---|
|
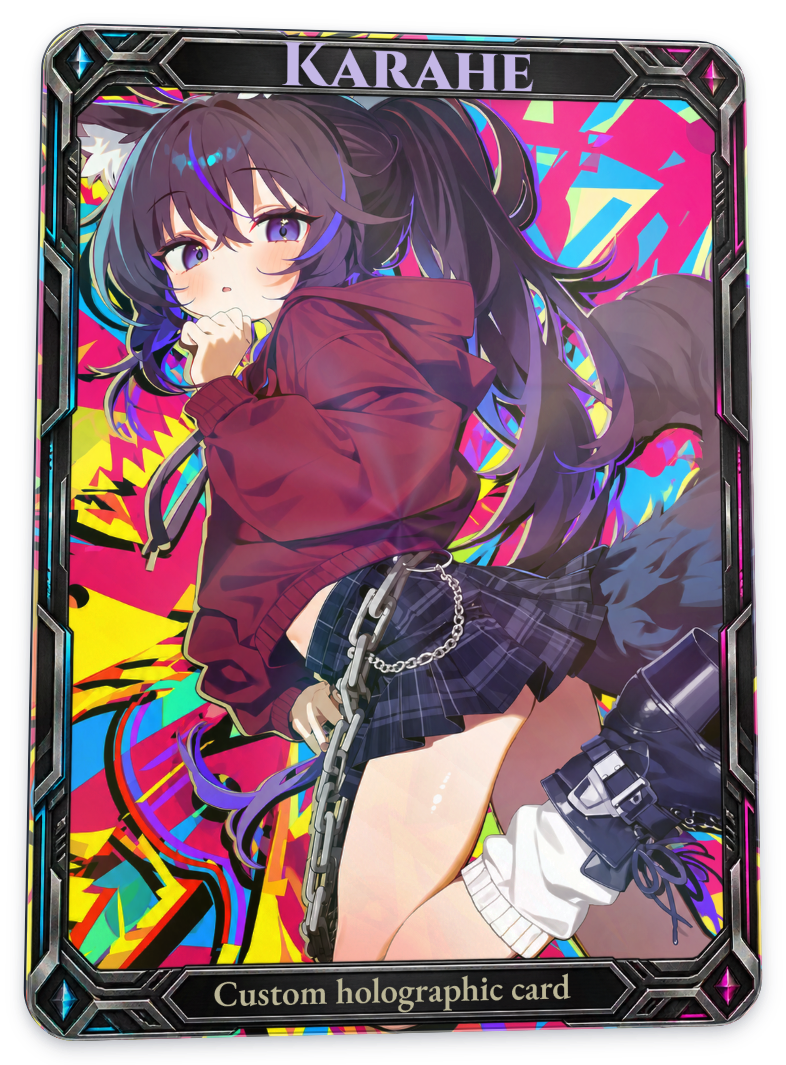 |
Layers colored reflections from different directions. For a fixed lattice pattern, choose Radiant Lattice under Surface Texture later in this guide.
V Spectrum
| Before · Standard | After · V Spectrum |
|---|---|
|
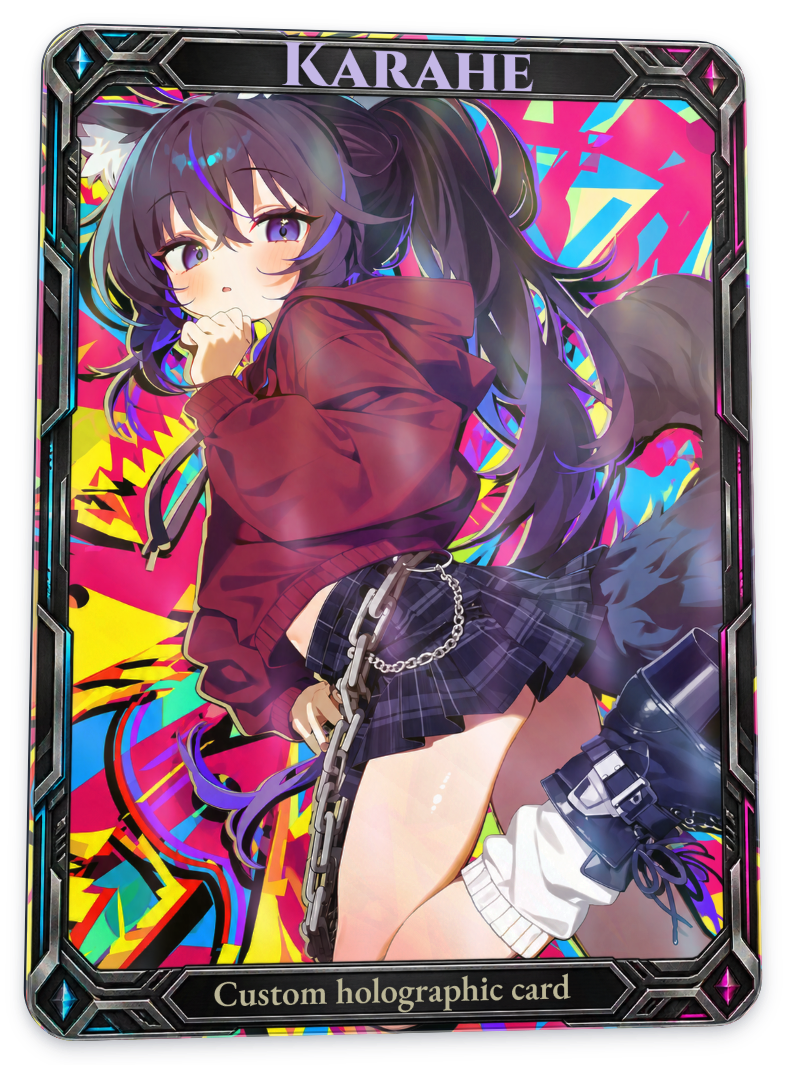 |
Emphasizes the directions in which multiple reflection bands cross. It is separate from the Chevron texture, which fixes a V-shaped pattern to the card. As you move the card, the bands’ intersections and colors change.
Reflection pattern
Reflection mode determines the kind of light response; reflection pattern determines its underlying flow. The comparisons below keep Standard and no surface texture, changing only the pattern.
From Clean Crossing to Diagonal Flow
| Before · Clean Crossing | After · Diagonal Flow |
|---|---|
|
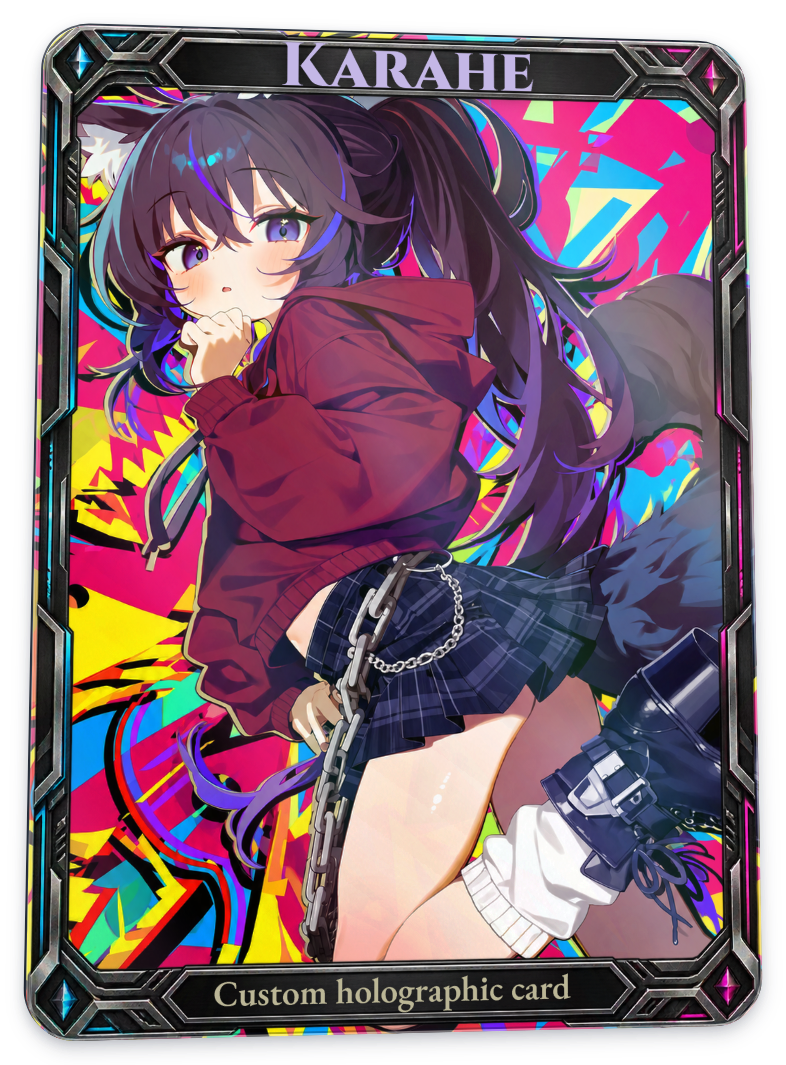 |
The default Clean Crossing uses a gently crossing foundation. Diagonal Flow produces a diagonal flow. After choosing a pattern, adjust its strength or Reflection band angle.
From Clean Crossing to Radial Fan
| Before · Clean Crossing | After · Radial Fan |
|---|---|
|
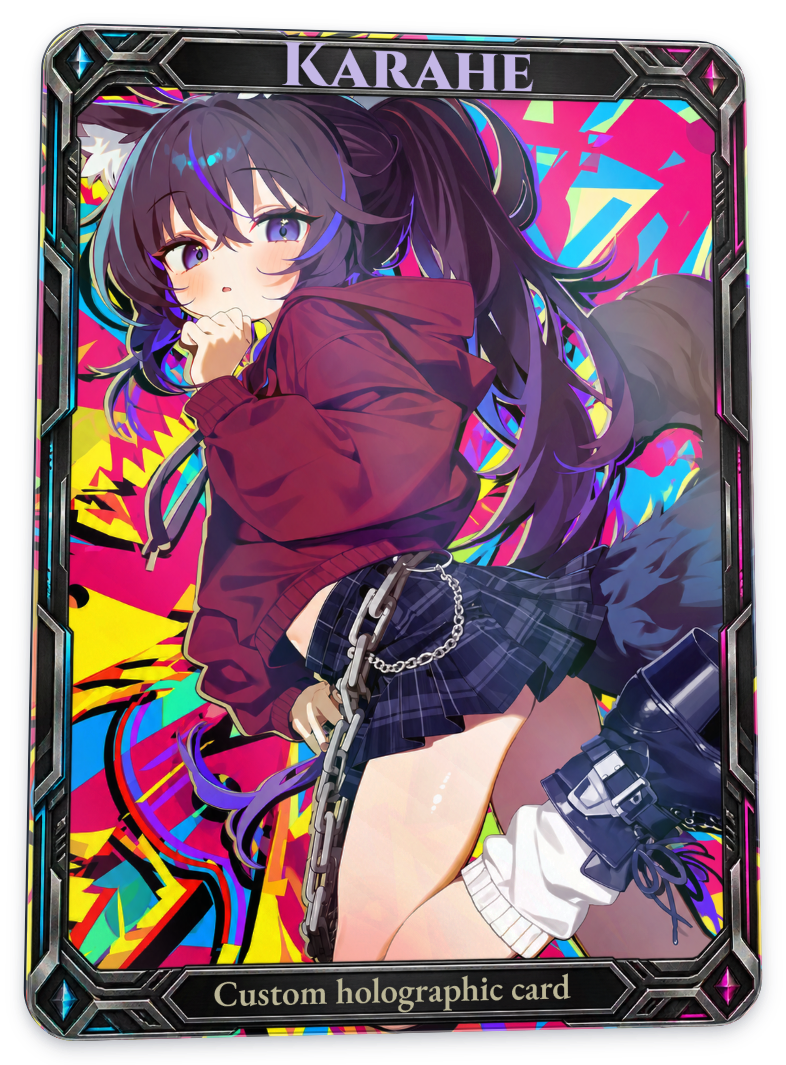 |
A reflection pattern that spreads outward from one point. It can be paired with the similarly named Radial texture, but the two options are selected independently.
Reflection colors and spectra
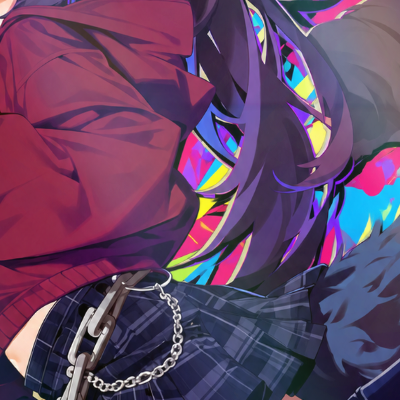
The comparisons below enlarge the same area in the center of the card. Every left-hand image uses Classic Spectrum; the right-hand image uses the selected color spectrum. Surface texture is disabled.
Each palette also emphasizes reflections slightly differently. Strong colors in the original artwork can make changes subtle, and not every color appears at once in a still image.
Soft Aurora
| Before · Classic Spectrum | After |
|---|---|
 |
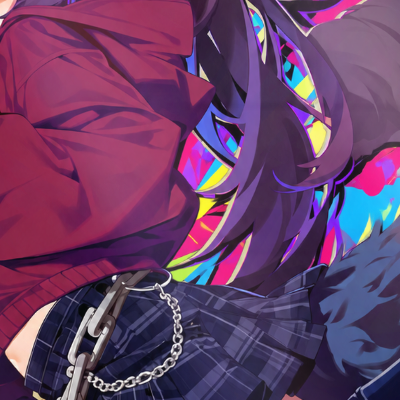 |
A soft mix of mint, pale purple, and pink. Try it for subtle colored reflections that do not substantially change the artwork’s mood.
Cosmic Dust
| Before · Classic Spectrum | After |
|---|---|
|
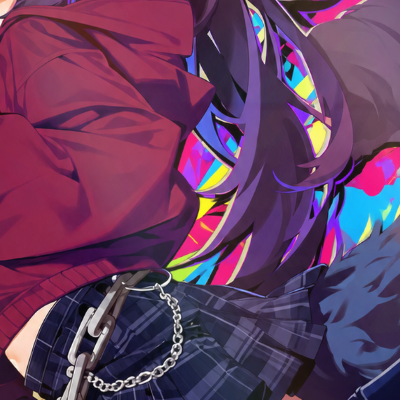 |
A reflection palette mixing purple and teal with warm orange tones.
Gilded Lattice
| Before · Classic Spectrum | After |
|---|---|
|
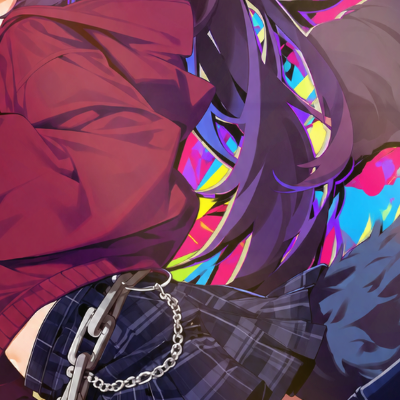 |
Gold, yellow-green, and reddish-brown reflections. It can suit metallic decoration, but a lattice pattern must be selected separately as a texture.
Prism Bloom
| Before · Classic Spectrum | After |
|---|---|
|
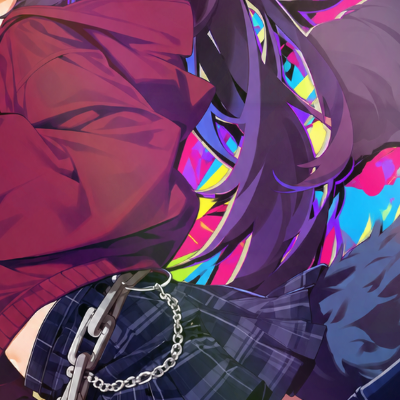 |
Uses pink, cyan, and light green. Try it when you want bright colored reflections rather than warm metallic tones.
Full Spectrum
| Before · Classic Spectrum | After |
|---|---|
|
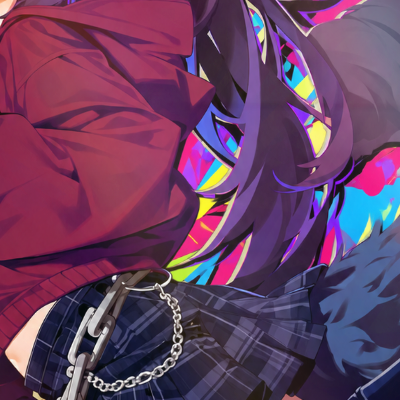 |
A vivid reflection palette including red, cyan, and yellow. Some changes look subtle with this artwork and angle.
Radiant Lines
| Before · Classic Spectrum | After |
|---|---|
|
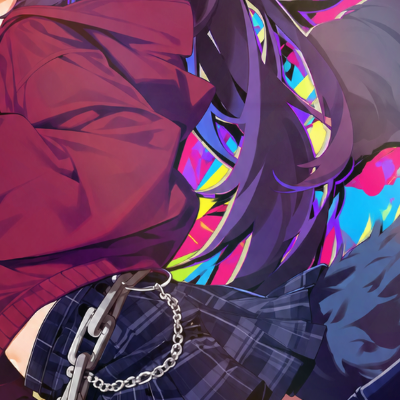 |
A reflection palette of orange, blue, and purple tones.
Relic Wave
| Before · Classic Spectrum | After |
|---|---|
|
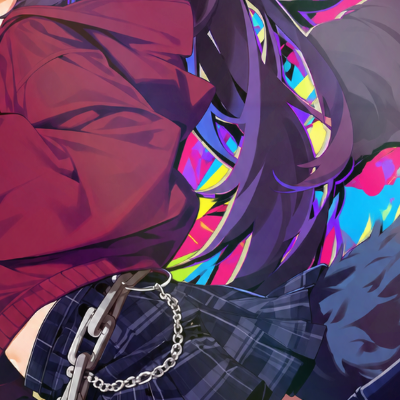 |
Uses yellow-green, teal, and coral, combining cool and warm tones.
Energy Flux
| Before · Classic Spectrum | After |
|---|---|
|
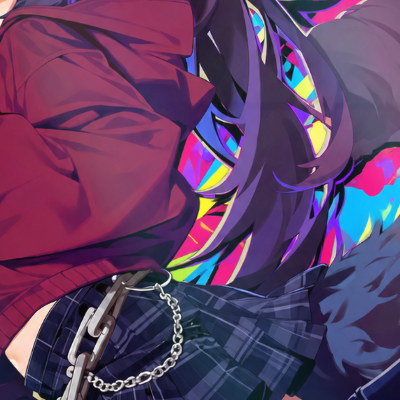 |
A mix of green, blue, and magenta. It can suit neon-colored artwork, though moving the card makes differences easier to see when the original colors are already strong.
Detailed reflection
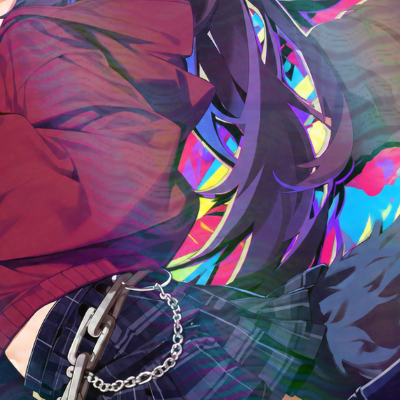
Baseline, Diffraction, and Prismatic under Reflection → Detailed reflection change the finer light response of the same texture. Selecting the similarly named Diffraction preset earlier in this guide also changes the texture. Here, Classic’s Contour texture and all other values stay the same.
From Baseline to Diffraction
| Before · Baseline | After · Diffraction |
|---|---|
 |
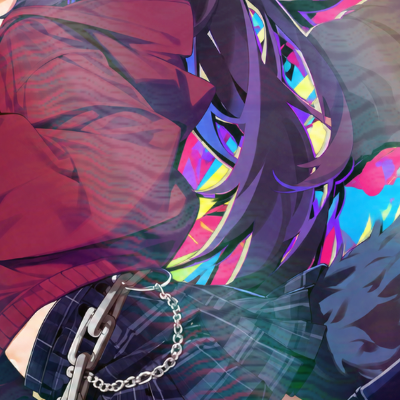 |
Keeps the same Contour pattern while changing the reflection band and the color transitions around it.
From Baseline to Prismatic
| Before · Baseline | After · Prismatic |
|---|---|
|
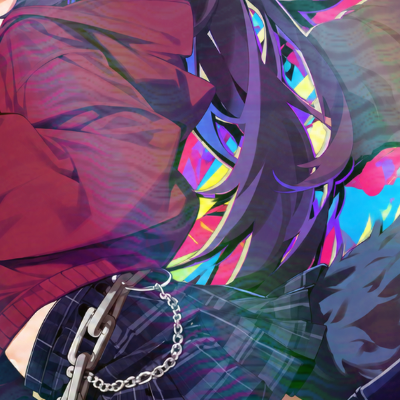 |
Changes the color response visible in the texture’s grain. Both modes make small adjustments. To change the broader appearance, start with Reflection mode or Reflection pattern.
Reflection strength and angle
Reflection pattern strength
| Before · 20% | After · 100% |
|---|---|
 |
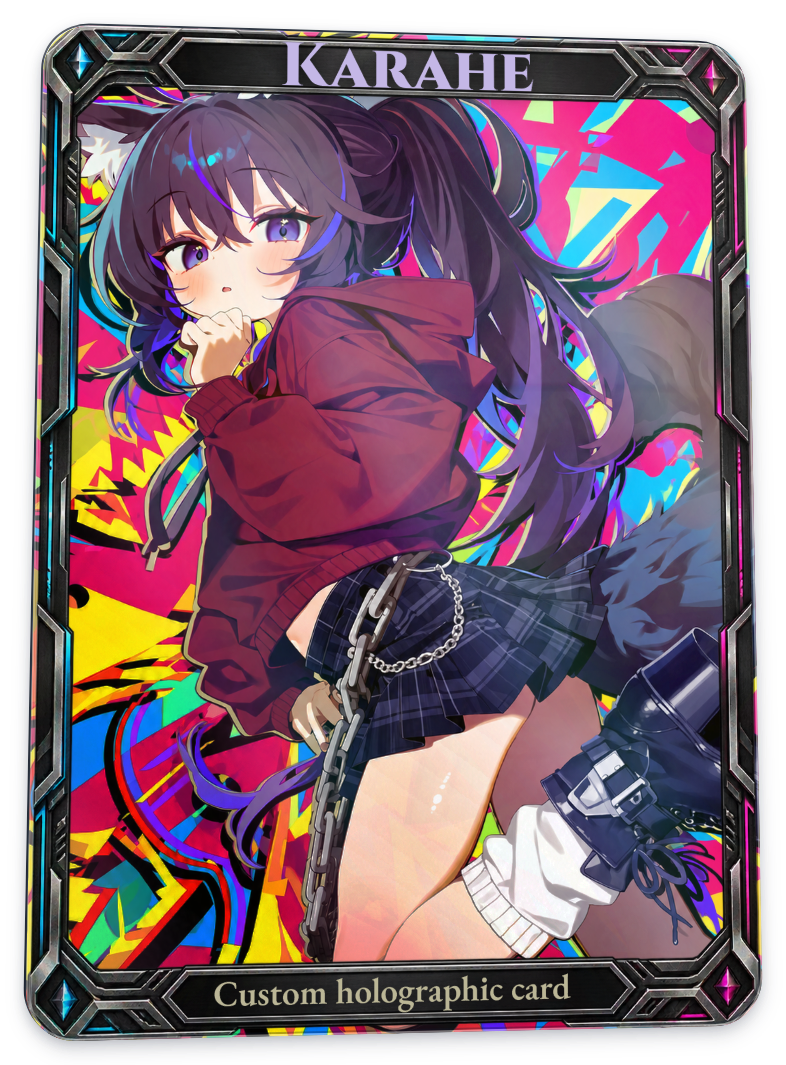 |
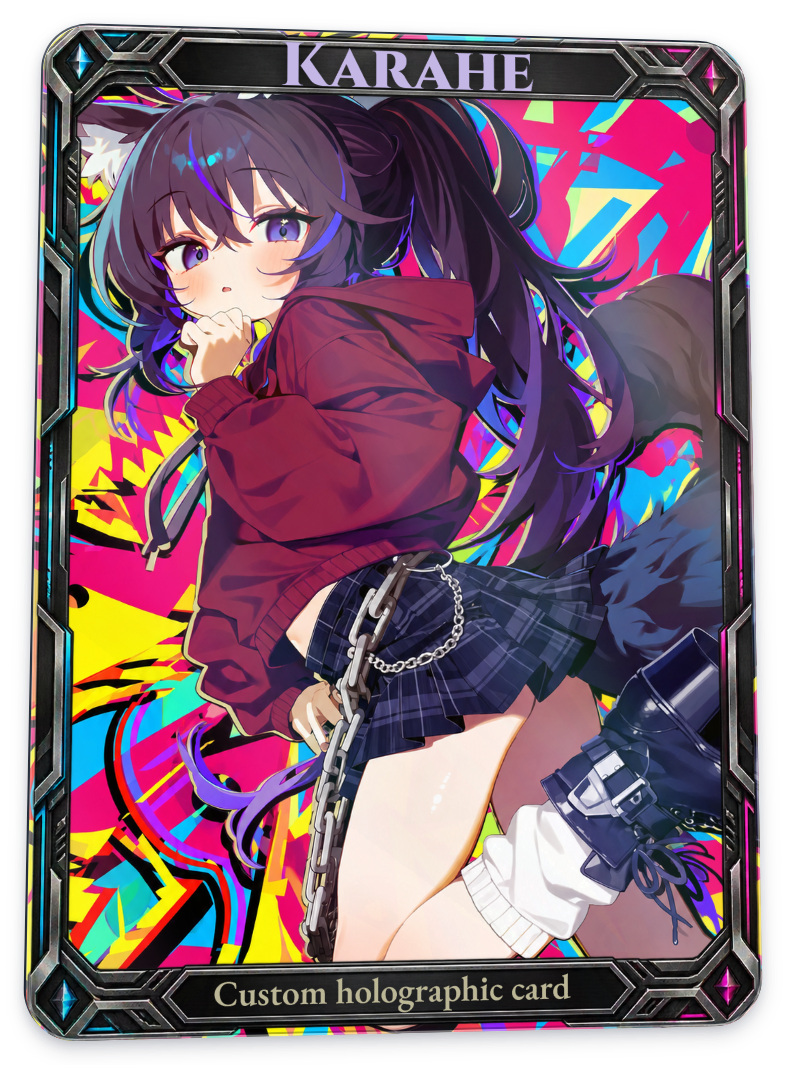
Controls how strongly the selected reflection pattern appears. Texture is disabled here. Direct glare retains its separate setting.
Direct glare
| Before · 0% | After · 100% |
|---|---|
 |
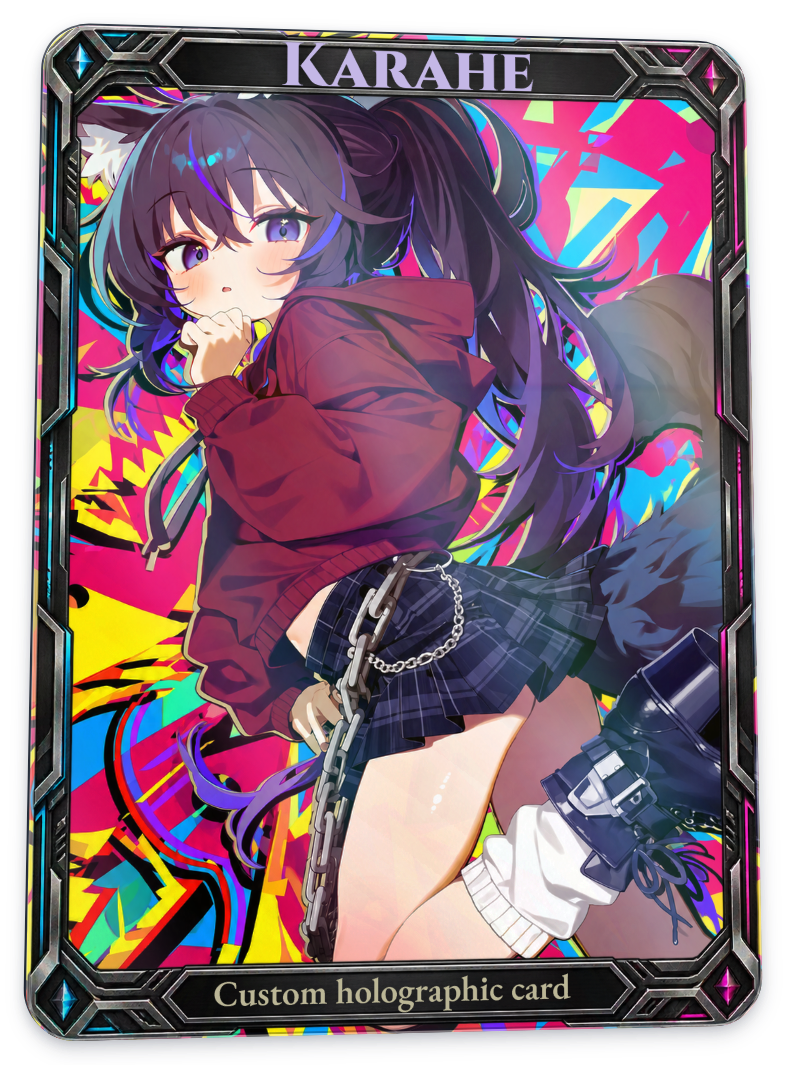 |
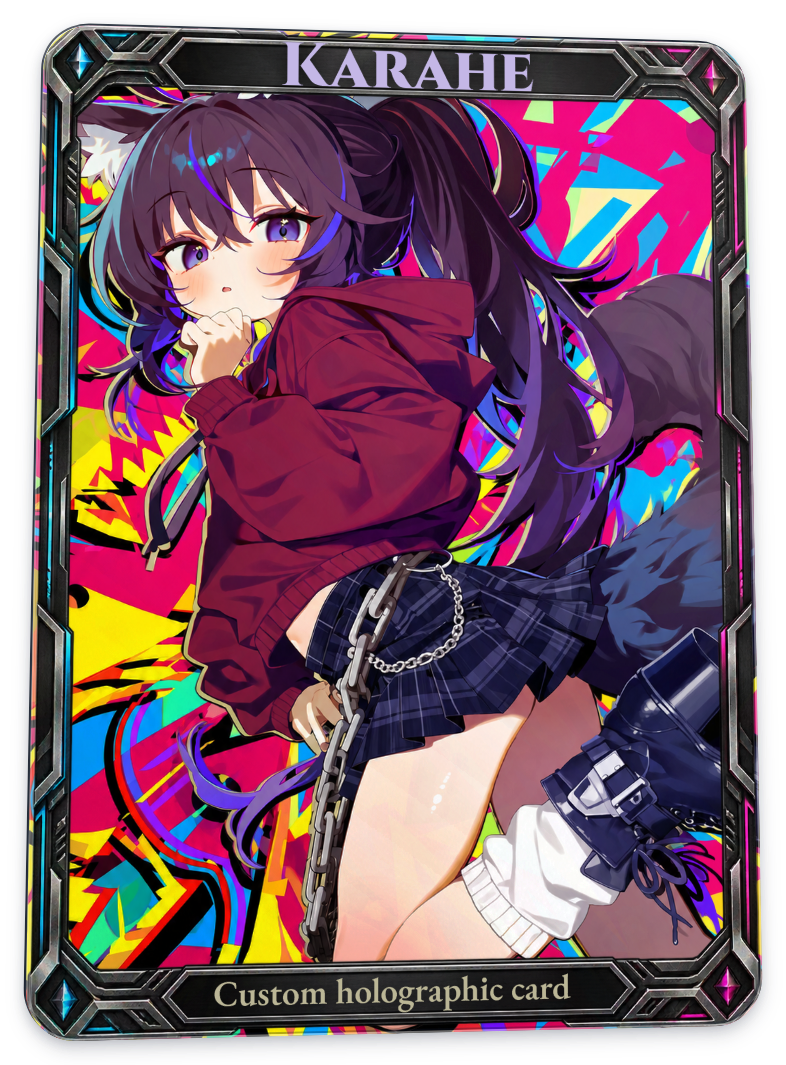
Controls the bright reflection where light hits the card. The amount of brightening depends on the light’s position.
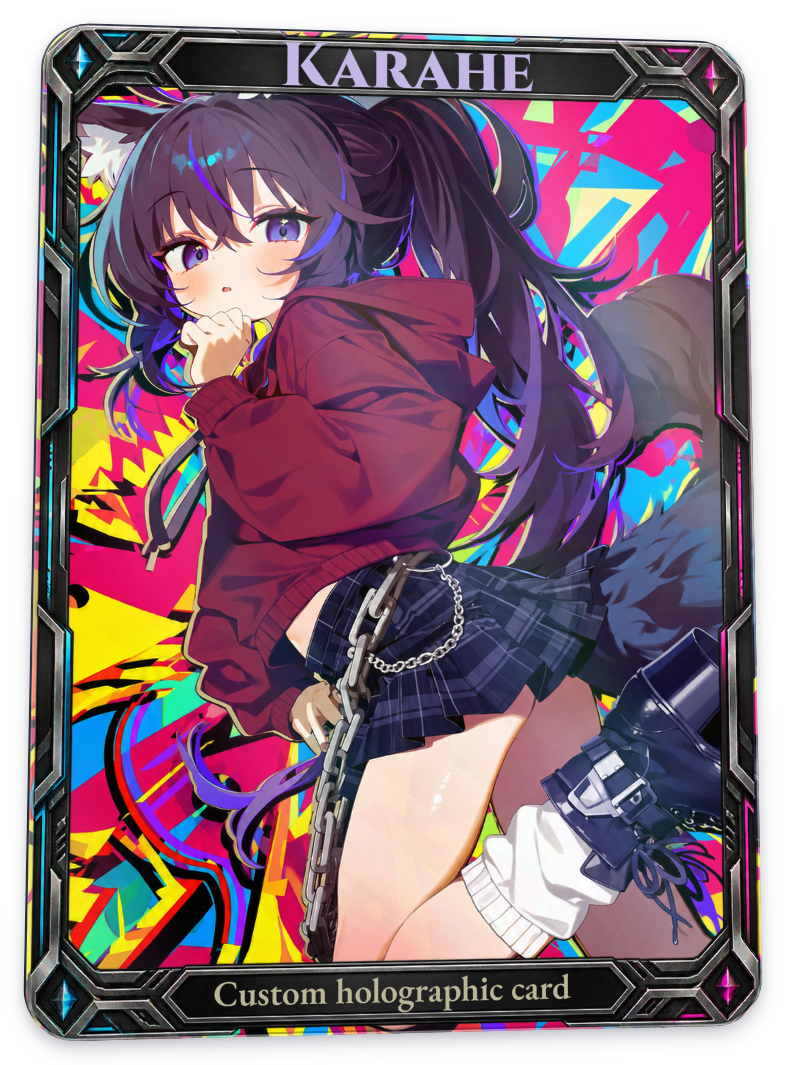
Reflection band angle
| Before · 0° | After · 90° |
|---|---|
 |
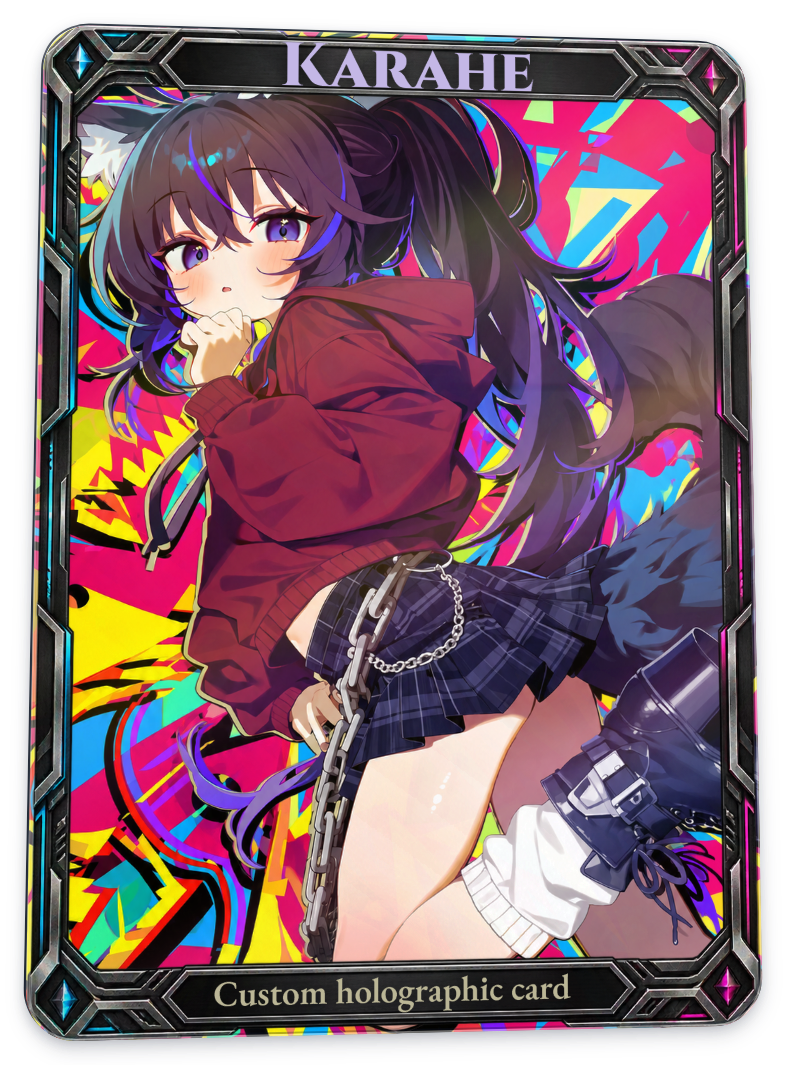 |
Changes the direction of the light band while keeping the card’s tilt and artwork orientation unchanged. To rotate the surface pattern as well, adjust Texture angle separately.
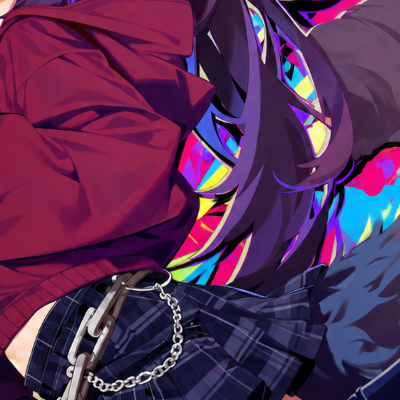
Detailed response strength
| Before · 0% | After · 100% |
|---|---|
 |
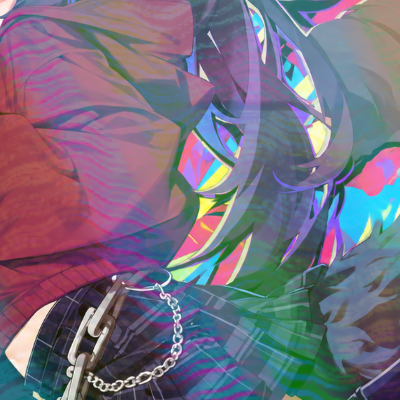 |
Controls the strength of the selected detailed reflection response. It does not switch all foil effects on or off, so other reflections can remain at 0%.
Surface texture
Choose a texture under Surface Texture → Whole card. The left-hand images below keep reflections but remove the texture. On the right, Texture strength is 70%, density is 100%, and angle is 0° throughout.
These are small, light-reactive surface patterns, distinct from the separate relief created by Emboss / Deboss in Print Materials. The character and background in these examples inherit the whole-card settings.
Contour
| Before · no texture | After · Contour |
|---|---|
|
|
Winding lines resembling contour lines on a map. The grain is easy to see on flat areas of color and is included in the default Classic preset.
Chevron
| Before · no texture | After · Chevron |
|---|---|
|
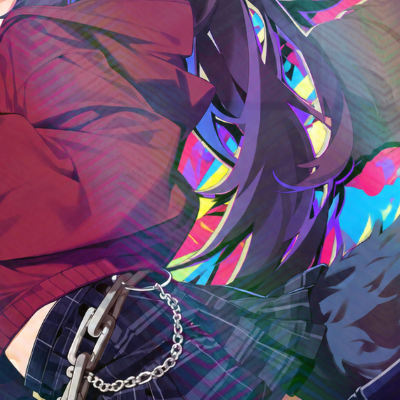 |
A repeating pattern of V shapes and zigzags. It creates a fixed direction of repetition on the card surface, separate from the reflection band.
Radial
| Before · no texture | After · Radial |
|---|---|
|
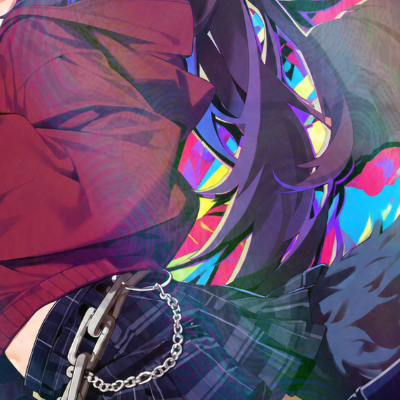 |
Lines spreading from a point. The Radial Fan reflection pattern controls broad light distribution; this texture provides the fine lines.
Radiant Lattice
| Before · no texture | After · Radiant Lattice |
|---|---|
|
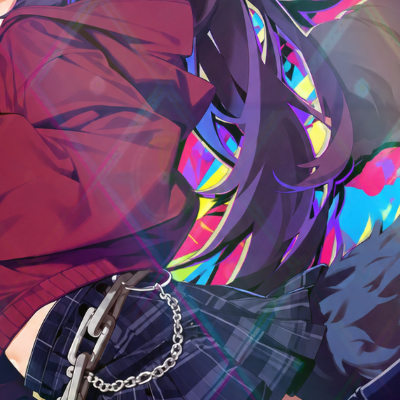 |
A lattice of crossing lines. Change its spacing with Texture density.
Holo Scan
| Before · no texture | After · Holo Scan |
|---|---|
|
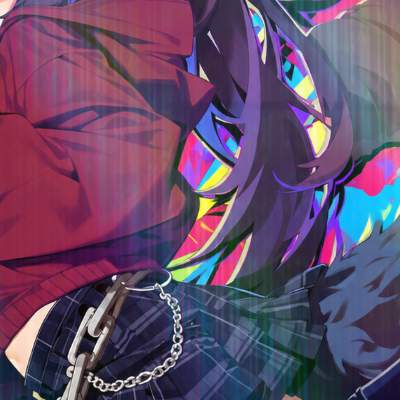 |
A dense pattern of repeating lines. The Holo Scan preset combines colors and reflection settings as well; this option selects only the texture.
Focus Pulse
| Before · no texture | After · Focus Pulse |
|---|---|
|
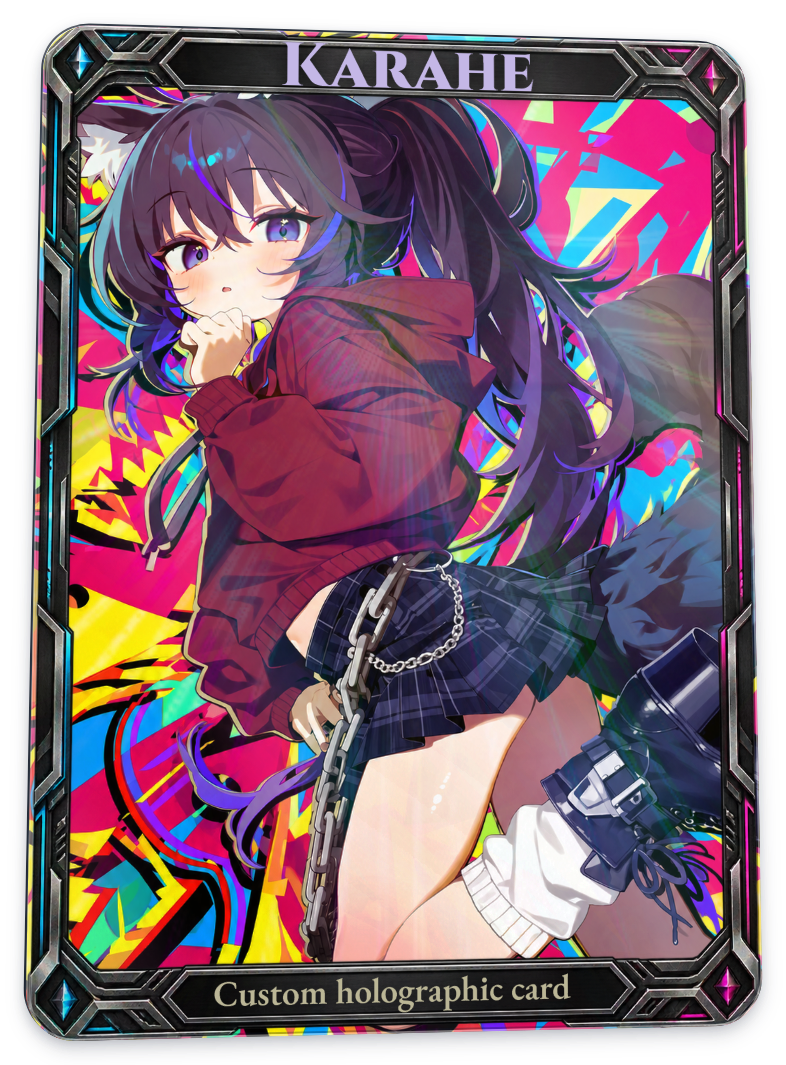 |
Uses lines that converge toward and spread from a point near the top of the card. This comparison shows the whole card so the pattern’s center is visible.
Adjusting textures
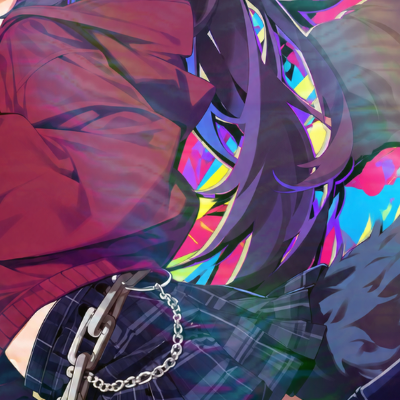
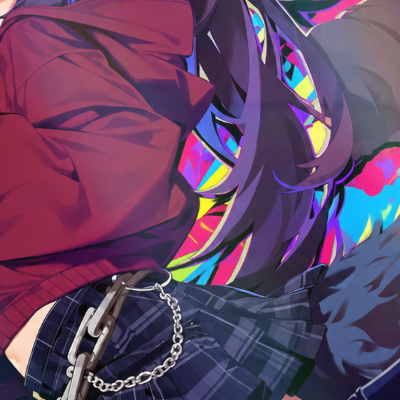
The close-ups below show the same area with a Contour texture. Strength, density, and angle serve different purposes; adjusting one at a time makes the result easier to understand.
Density
| Before · 50% | After · 200% |
|---|---|
 |
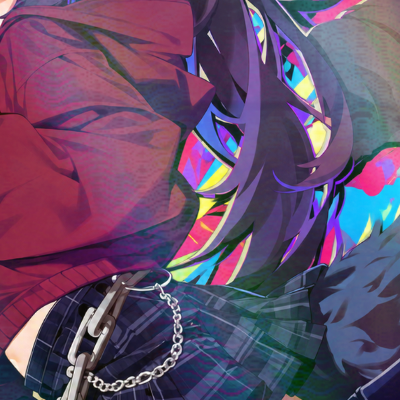 |
Higher density fits more pattern into the same area. The selectable range is 40–300%. Increasing density is different from increasing reflection strength, and very small patterns may be hard to see on a reduced-size card.
Angle
| Before · 0° | After · 45° |
|---|---|
|
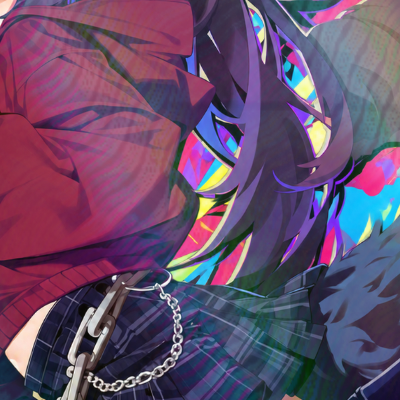 |
Rotates the pattern on the card surface. Reflection band angle, compared earlier, controls the light’s direction; this setting controls the fine pattern’s direction.
Strength
| Before · 0% | After · 100% |
|---|---|
 |
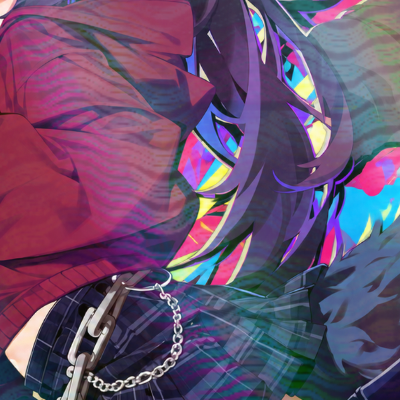 |
Changes how strongly the pattern appears when lit. At 0%, broad foil reflections remain because they are separate from the texture.
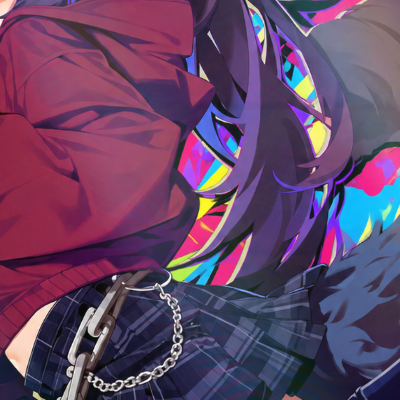
Highlight strength
| Before · 0% | After · 100% |
|---|---|
 |
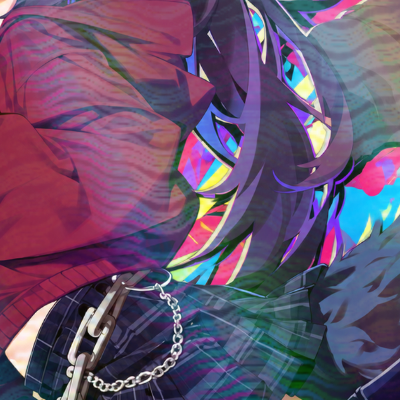 |
Controls the strength of the texture’s illuminated areas. This comparison uses the whole-card setting to change highlight responses on both character and background.
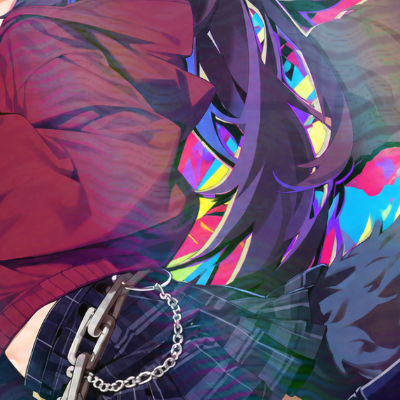
Shadow strength
| Before · 0% | After · 100% |
|---|---|
 |
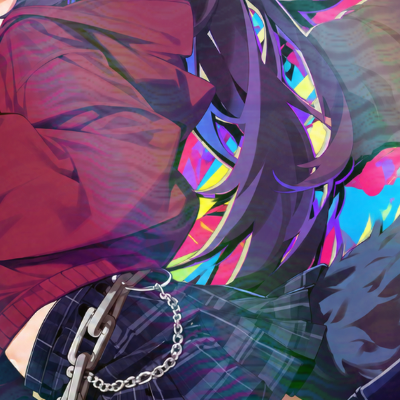 |
Controls how strongly the texture’s shadows and dark grain appear. Compare naturally dark areas such as black hair and dark clothing. Rather than simply maximizing it, find a level that preserves the artwork’s shading.
Use different textures for different targets
Under Surface Texture, you can select Character, Background, or Frame as well as Whole card. Separate character and background uploads let you style each area independently. A combined image is treated as one target across the entire file.
These examples start with Contour for the whole card, then change each target’s pattern one at a time. Texture strength stays at 70%, density at 100%, and angle at 0°.
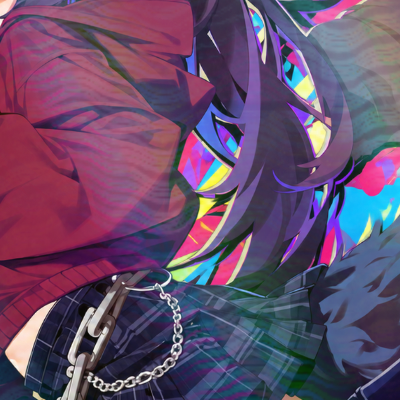
Change only the character
| Before · character inherits card settings | After · Chevron on character only |
|---|---|
 |
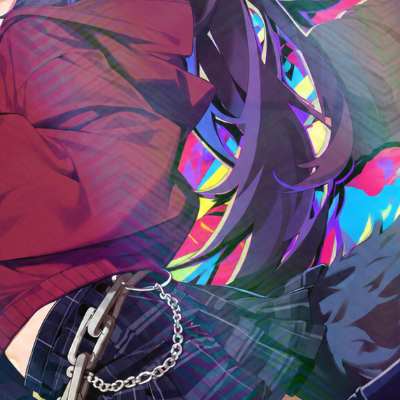 |
The background keeps Contour while only the character receives Chevron. On the red clothing, the winding lines become V shapes.
Give the background its own texture
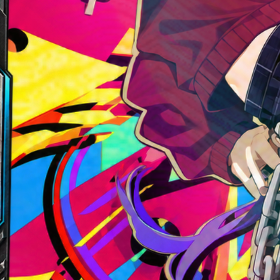
| Before · background inherits card settings | After · Radiant Lattice on background |
|---|---|
 |
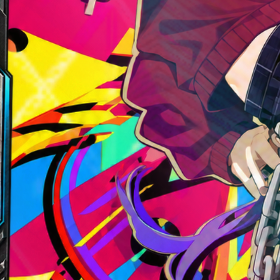 |
These crops show the left side of the card, where more background is visible. The character keeps Chevron while only the background changes to Radiant Lattice. A target with its own setting can retain its pattern when you change the whole-card texture.
Apply a texture to the frame
| Before · frame inherits card settings | After · Holo Scan on frame |
|---|---|
 |
 |
Enable Frame hologram material to apply a pattern to the frame. It is enabled on both sides of this comparison, which changes the frame’s Contour texture to Holo Scan. Look at the dark areas beside the title to see the difference in lines.
Set each text item’s hologram and texture separately in that item’s settings. The title and bottom caption in this chapter keep their position, color, and font, with their separate hologram materials disabled.
Inspect effects on their own
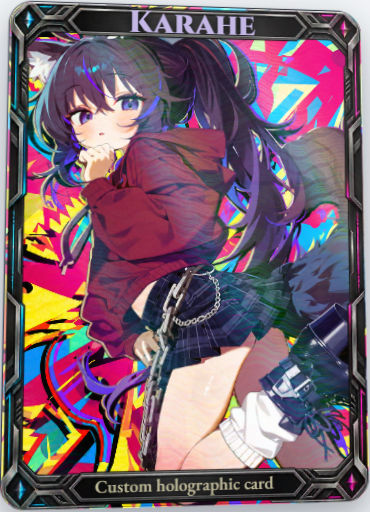
If busy artwork makes differences hard to see, use View reflection pattern and View surface texture. The images below are screenshots of the actual preview area, captured differently from the regular comparison tables.
View reflection pattern
| Before · composited on the card | After · reflection pattern only |
|---|---|
 |
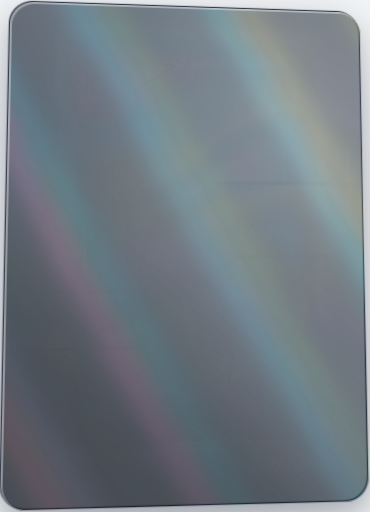 |
Inspect the reflection pattern on a neutral gray viewing background while leaving the original card intact.
View surface texture
| Before · composited on the card | After · surface texture only |
|---|---|
|
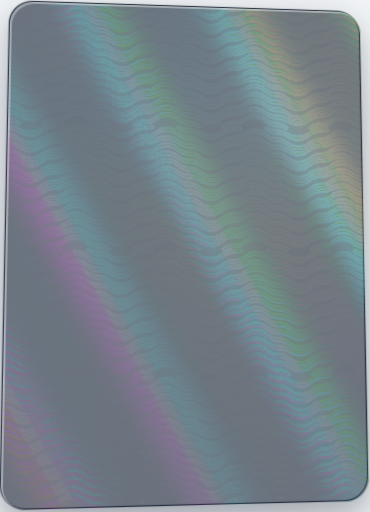 |
Inspect the texture’s lines and light response without the artwork. Check that the pattern is visible in this view, then adjust its strength while viewing it on the card. This helps you tell whether the artwork’s colors were masking the pattern. Both views are for inspection while editing; PNG exports retain the original card composition.
When differences are hard to see
If the texture is too fine, lower its density a little. If the reflection pattern is faint, increase its strength and compare. If Character or Background has an individual texture selected, check whether it inherits the whole-card setting. Finally, move the card slowly. Bright or strongly colored artwork can make the same settings look different.
These examples show digital reflections on screen. Check a print shop’s samples for the color, feel, and finished results of physical foil and print materials.
Related guides
Getting started · Print materials · Surface finishes · Light, environment & ink · Text
AI disclosure
Translated with OpenAI Codex using GPT-6 Astra (xhigh reasoning). Reviewed and edited by Yioo.